Manually Install Printer Drivers
Installing printer drivers manually can seem intimidating, especially if you're not tech-savvy. But the process is straightforward and often necessary when your printer isn't automatically recognized by your computer. This guide will help you manually install drivers and get your printer working quickly.
When Do You Need to Manually Install Drivers?
You may need to manually install printer drivers in the following situations:
- Automatic installation fails or the printer isn't detected
- Your operating system doesn't include built-in drivers for your printer
- You’re using an older printer model
- You want to use updated or custom drivers
Where to Find the Correct Driver
The best source for drivers is the official website of your printer's manufacturer. Follow these steps:
- Visit the support section of the printer brand’s website (e.g., HP, Canon, Epson, Brother)
- Enter your printer model number
- Select your operating system
- Download the latest version of the driver
Steps to Manually Install Printer Drivers
-
Download the Driver File:
- Save it to a known location such as your Desktop or Downloads folder.
-
Run the Installer:
- If the file is an executable (.exe), double-click it and follow the on-screen instructions.
-
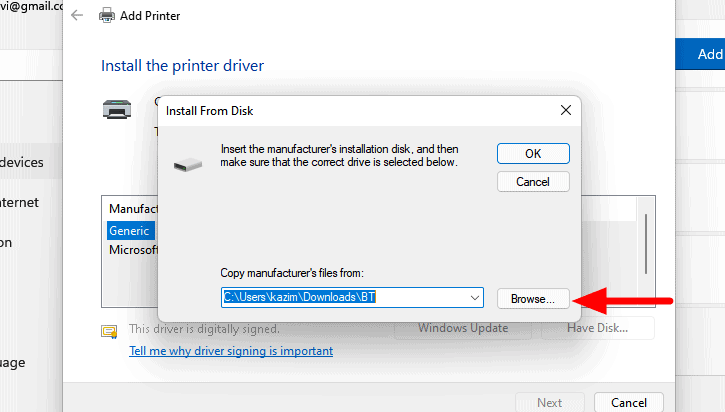
Use "Add a Printer" Wizard (if no installer is included):
- Go to Settings > Devices > Printers & Scanners
- Click Add a printer or scanner
- If your printer isn’t listed, click The printer that I want isn’t listed
- Select Add a local printer or network printer with manual settings
- Choose the correct port (usually USB or TCP/IP)
- Click Have Disk and browse to the downloaded driver folder
- Select the INF file and complete the installation
Troubleshooting Driver Installation Issues
- Ensure you’ve downloaded the driver version that matches your OS (e.g., Windows 10 64-bit)
- Temporarily disable antivirus or firewall if it blocks installation
- Restart your computer after installation
- Check Device Manager for driver conflicts
Conclusion
Manually installing printer drivers is a useful skill, especially when automatic methods fail. By following these simple steps, you can ensure your printer runs smoothly and stays compatible with your system.